

Purpose
Choose the Exact Online Trade administration, warehouses and import options for your Optiply account. You can do this yourself; Support is not a required setup step. Open Settings → Integrations → Add a source. Select Exact, then choose Next to open Connect to system. Select your Domain and enter your Division ID and Default Warehouse Code, review the import options and choose Connect to authorize in Exact. If Exact is missing, contact support; do not select Exact Globe instead.
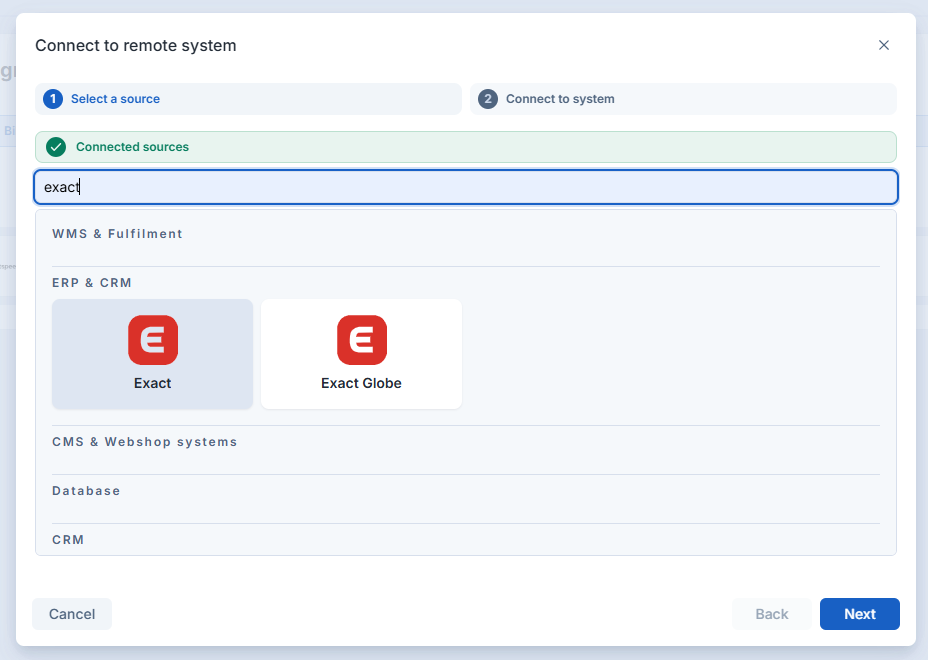
Use Exact for this connection. Exact Globe is a separate option in the source list.
Before you start
Open the Optiply account where you want to connect Exact, with permission to manage integrations. Have your Exact Online domain, Division ID and Default Warehouse Code ready. For multiple warehouses, also have the warehouse IDs you want to include. Your Exact user must have access to the intended administration and be able to grant the connection permission to use it. Keep your login and two-step verification method ready; enter them only on Exact's login page, never in a Support message.
Steps
1. Select Exact
- Open Settings → Integrations and wait for the source lists to load.
- Choose Add a source and search for exact.
- Select Exact, then choose Next to open Connect to system. Do not select Exact Globe for this connection. If Exact is not listed, contact support; do not substitute another connector.
2. Enter your connection details
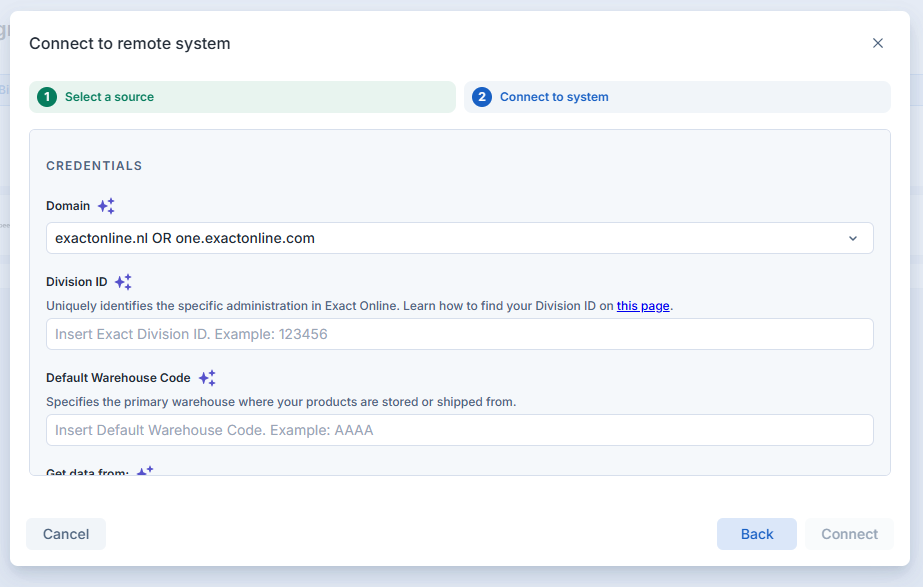
- Select your Domain and enter your Division ID and Default Warehouse Code.
3. Choose your warehouse scope
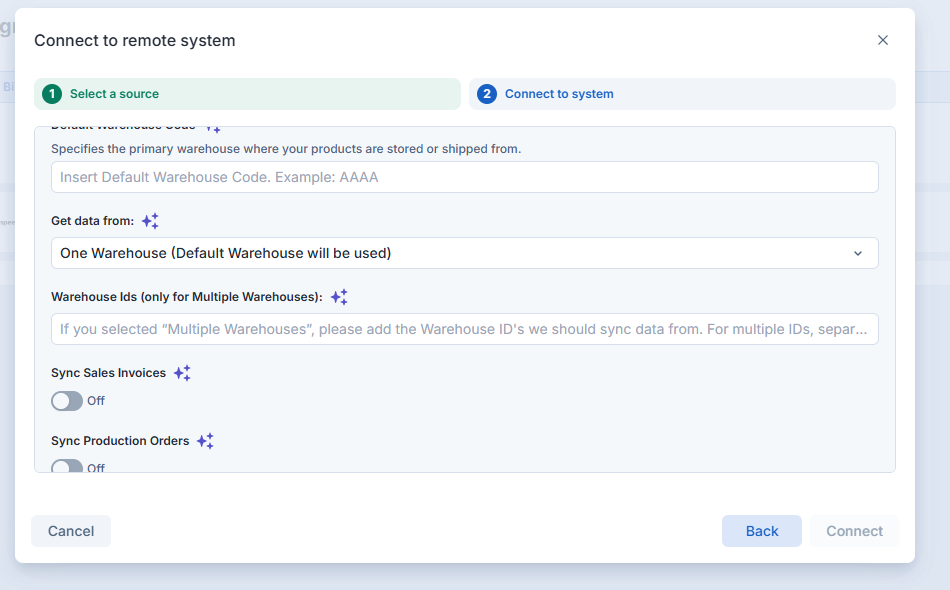
- Under Get data from, choose your warehouse scope. With One Warehouse (Default Warehouse will be used), the default warehouse is used. For Multiple Warehouses, complete Warehouse Ids (only for Multiple Warehouses) with the warehouses you want to include.
- Review Sync Sales Invoices and Sync Production Orders and choose the settings appropriate for your setup.
4. Review product and supplier options
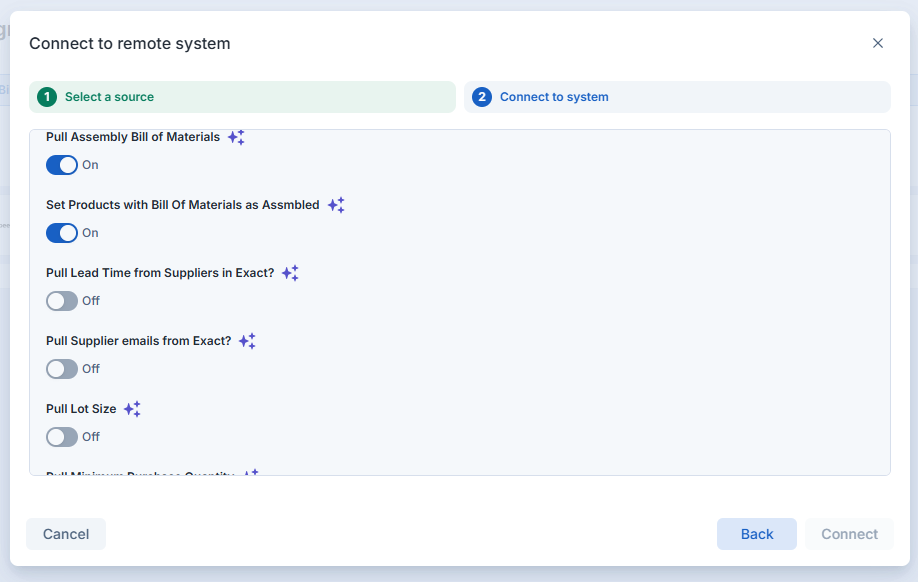
- Review the available options before connecting:
- Pull Assembly Bill of Materials
- Set Products with Bill of Materials as Assembled
- Pull Lead Time from Suppliers in Exact?
- Pull Supplier emails from Exact?
- Pull Lot Size
- Pull Minimum Purchase Quantity
- Pull Lead Time from Supplier Products in Exact?
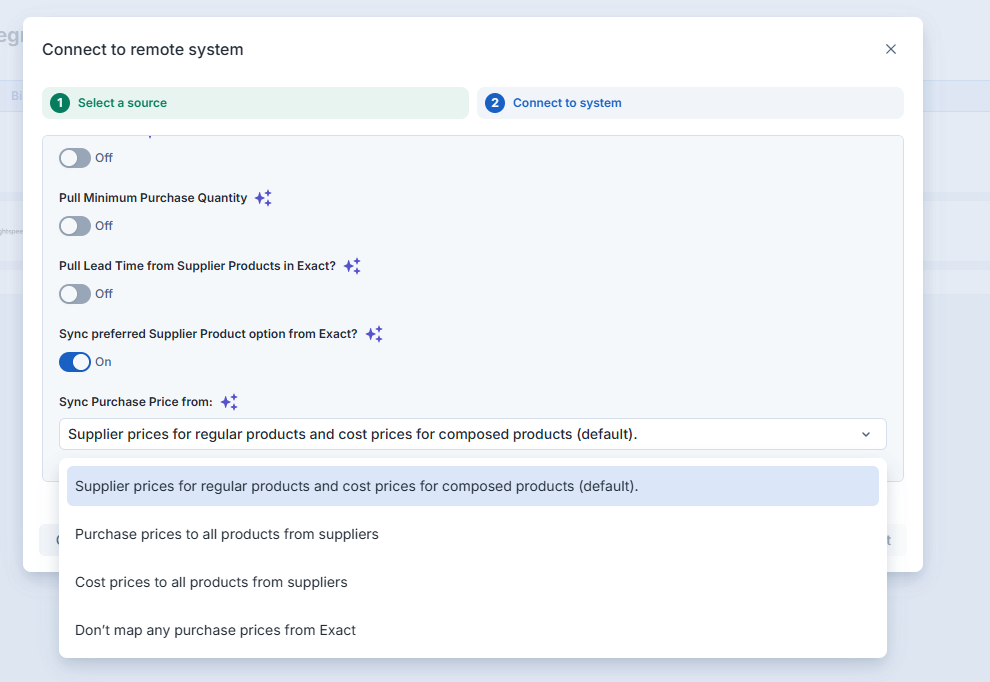
- Sync preferred Supplier Product option from Exact?
Choose the options that match your setup. The switch positions shown are examples, not recommended settings for every account.
5. Choose the purchase-price source
- Under Sync Purchase Price from, choose one of these options:
- Supplier prices for regular products and cost prices for composed products (default).
- Purchase prices to all products from suppliers
- Cost prices to all products from suppliers
- Don’t map any purchase prices from Exact
6. Authorize access in Exact
- When the form is complete, choose Connect. For the Exact connection, Optiply opens an authorization popup using your chosen domain. Allow popups for Optiply if the window is blocked.
- Sign in on the Exact page. Complete two-step verification when Exact requests it. On a first authorization, review the consent screen and the administrations the connection may access; include the administration matching your Division ID before granting access. Existing consent can mean that Exact does not show a new consent screen.
- Return to Settings → Integrations after the popup closes and look for the linked Exact source and Connected label. The popup closing is not, by itself, a success message. Check the source's jobs and the records you expect to import separately.
Exact explains its login, consent and administration-selection sequence in its official authorization guide. The normal Optiply flow opens this authorization for you; do not create a separate Exact app or paste app secrets into the form as a substitute.
Fields and columns
- Domain: the domain used by your Exact Online account.
- Division ID: identifies the specific administration in Exact Online. See Find your Exact Online division code.
- Default Warehouse Code: identifies the primary warehouse where your products are stored or shipped from.
- Warehouse Ids: identifies the warehouses to include when using multiple warehouses.
- Connected: labels a linked source in Settings → Integrations; it does not by itself confirm that particular records have been transferred.
Expected result
Your selected administration, warehouse scope and import options are submitted through the connection flow. After authorization, Settings → Integrations lets you check the linked source and its Connected label. Review the imported records separately before using them for purchasing decisions.
Limitations
Available sources and the number of integrations depend on your account. If the form shows a Support message instead of connection fields, use that route rather than selecting Exact Globe or creating a second connection. The shown switches are not recommended settings for every account. A completed form or Connected label is not confirmation that particular records have synchronized, and this procedure does not promise a first-import time.
Errors and recovery
If Add a source is disabled, wait for the source lists to load. If Connect is unavailable, review the form for missing details or validation messages. If Exact is missing, a control remains unavailable, or the expected linked source does not appear after setup, contact support.
If Exact rejects access or the intended administration is missing, ask your Exact administrator to check your user access and the app's administration consent. If the popup was blocked, allow it for Optiply and retry. If an error remains, share the connector name, the step that failed, a redacted description of the visible error and the time with Support. Remove account, administration and personal identifiers; never send a password, token, two-step code or the full authorization URL. Do not resend orders to test whether authorization worked.
Reconnect an existing Exact source
If Reconnect appears for Exact in Settings → Integrations, select it and authorize in the popup. It is disabled with view-only access, while source options load, or while that source's jobs are loading. Allow blocked popups for Optiply and retry. After the popup closes, wait about five seconds for the source list to refresh. Then recheck the source: popup closure alone does not confirm reconnection or synchronization. The five-second wait is for refreshing the list, not for completing a sync. If Reconnect remains or authorization fails, contact support.
Questions customers ask about connecting Exact Online
Optiply lost its connection to Exact Online. How do I reconnect?
Open Settings → Integrations, select Reconnect for the Exact source and authorize access in the Exact popup. After the popup closes, wait about five seconds for the list to refresh, and contact Support if Reconnect remains.
What do I need before I connect Exact Online to Optiply?
You need permission to manage integrations in Optiply, your Exact Online domain, Division ID and Default Warehouse Code. Your Exact user must have access to the intended administration and be able to grant the connection permission to use it.
How long does the first import from Exact Online take?
Optiply does not promise a fixed first-import time for Exact Online. After you connect, check the Exact source's jobs in Settings → Integrations and the records you expect before you use them for purchasing decisions.
Can I connect Exact Globe with the Exact Online Trade steps?
The Exact Online Trade connection uses the Exact source in Optiply. Exact Globe is a separate option in the source list, so do not select it for Exact Online Trade.