

Before you connect BigQuery
Work with your Google Cloud administrator and Optiply support. Agree the project, dataset, query configuration, enabled directions and permissions before creating credentials.
Read-only import access is separate from outbound writes. BigQuery Data Editor includes write permissions. BigQuery Job User permits query jobs but does not alone grant access to table data. Do not grant project-wide editing rights to solve an import error.
A service-account JSON key contains private credentials. Keep the whole file out of support messages, screenshots and shared documents. If your organization blocks key creation, ask your administrator for an approved setup. Do not bypass the policy.
Steps to connect BigQuery
Prepare the service account in Google Cloud
- Select the intended project in Google Cloud console.
- Under APIs & Services → Library, check that the BigQuery API is enabled.
- Open IAM & Admin → Service Accounts.
- Select the agreed existing service account, or choose Create service account with your administrator's approval.
- For a new account, enter its name and description.
- Review the generated service account ID before continuing.
- Choose Create and continue when assigning approved project roles, or Done when access is managed separately.
- Ask your administrator to grant only the approved data and job permissions at their agreed scopes.
- Open the service account and select Keys.
- If key creation is approved, choose Add key → Create new key.
- Select JSON, then Create.
- Save the downloaded key privately.
Google's service-account key guide explains key creation and organization-policy restrictions. A lost private key cannot be downloaded again. Arrange replacement through your administrator and support.
Select BigQuery in Optiply
- Open Settings → Integrations, then Add a source after the source lists load.
- In Select a source, search for BigQuery.
- Select BigQuery under Database, not BigCommerce.
- Choose Next to open Connect to system.
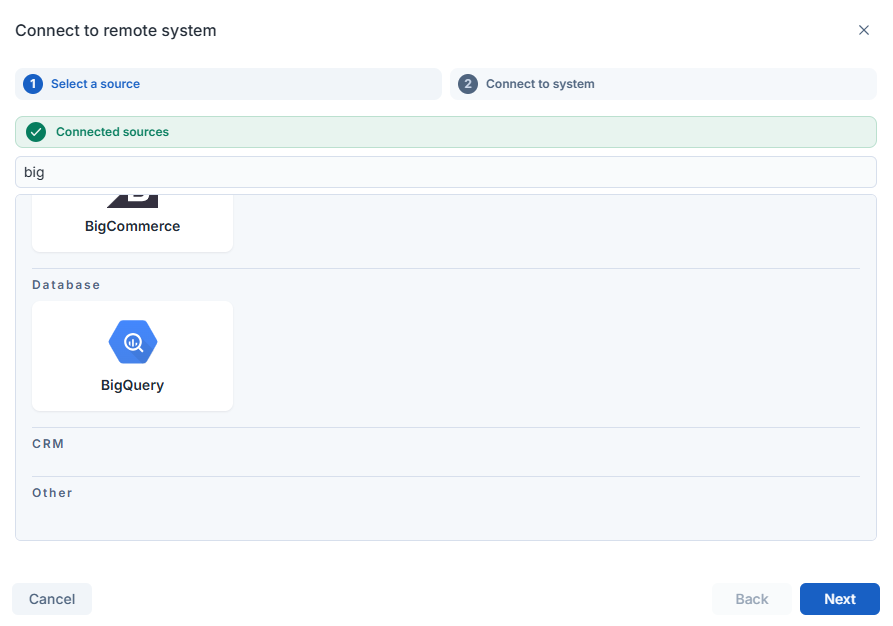
Enter the agreed connection settings
Continue only when a credential form is offered. If Contact us appears instead, use that support route to agree setup. The screenshots show one form. The offered fields can vary.
- Enter the intended project identifier in BigQuery project ID.
- Enter the agreed service-account values in the credential fields below.
- Enter the intended Dataset ID.
- Review Queries with support before entering the agreed configuration.
- Review the project, dataset, permissions and enabled directions with your administrator and support.
- When the configuration is confirmed and Connect is available, choose Connect.
- Return to Settings → Integrations to check the linked source.
- Check the agreed imported sample records with support.
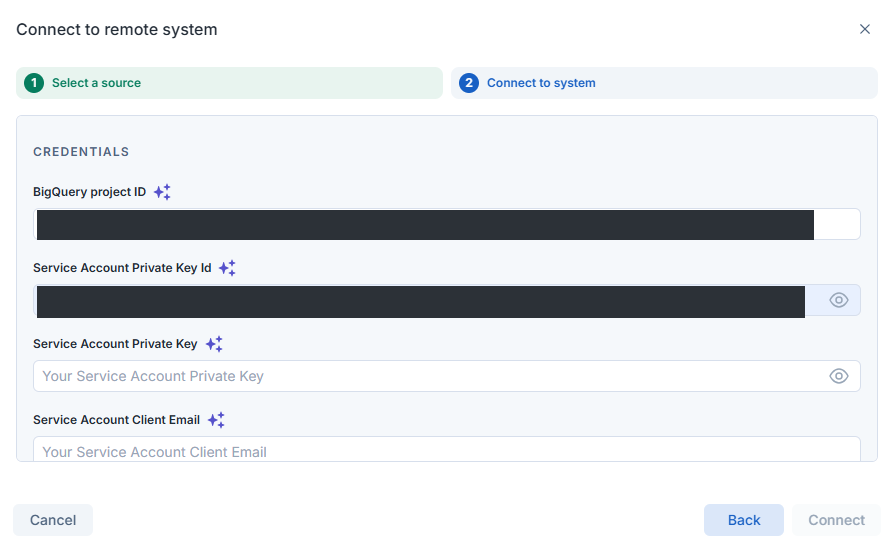
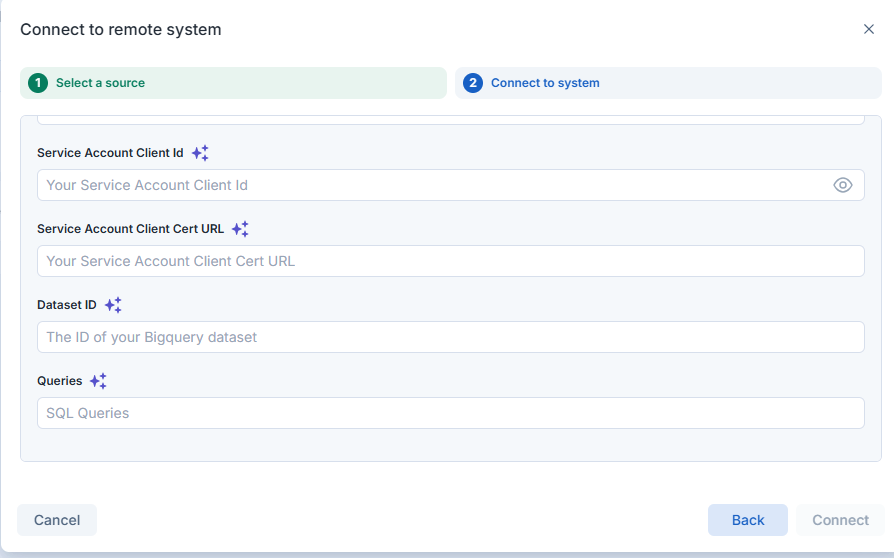
If BigQuery is missing or the form differs, stop before entering credentials and contact support.
Fields in the BigQuery connection form
| Field | Meaning |
|---|---|
| BigQuery project ID | The Google Cloud project identifier, not a user email address. |
| Service Account Private Key Id | Identifier of the service-account key. |
| Service Account Private Key | The private signing key. Enter it only through the approved credential form. |
| Service Account Client Email | The service account's email identity, not your personal login. |
| Service Account Client Id | The service account's client identifier. |
| Service Account Client Cert URL | The certificate URL associated with the service account. |
| Dataset ID | The dataset within the agreed project. It is separate from the project ID. |
| Queries | The extraction configuration agreed with support. Do not paste arbitrary SQL or invent its format. |
Have your administrator and support match the credential values to the offered fields before submission. Use this table only for matching labels in your form. If the form requires different values, stop and ask support. The masked screenshot values are not examples to copy.
What you see when BigQuery connection worked
The source appears in the linked-source list. Check the connection outcome and agreed sample records with support. Connected and a completed form are separate from successful data import and correct record relationships.
Limits of connecting BigQuery
If your account reaches its integration limit, the dialog routes you to support instead of a credential form.
Connector availability, query settings and enabled directions depend on the agreed account configuration. No fixed first-sync deadline follows from pressing Connect. Dataset data access, permission to run query jobs and permission to write outputs are different grants.
If BigQuery connection did not work
For blocked service-account or key creation, ask your administrator to review your permissions and organization policy. Keep existing security restrictions in place.
If Connect is unavailable or the connection fails, contact support with the step and sanitized error. Ask your administrator to check the project, service account, dataset and permission scopes. Never include the JSON key or private field values. Mask identifying details before sharing a screenshot.
Questions customers ask about the BigQuery connection
Do I need to contact Optiply to set up a BigQuery connection?
Yes, agree the project, dataset, Queries configuration and permissions with Optiply Support before you create credentials. If the BigQuery connection dialog shows Contact us instead of a credential form, Support continues the setup with you.
What do I need to connect BigQuery to Optiply?
You need a service-account JSON key for the intended Google Cloud project, the BigQuery project ID, the Dataset ID and the Queries configuration agreed with Support. Keep the JSON key out of support messages and screenshots.