

Before you connect EasyEcom
Open the intended Optiply account. Confirm the EasyEcom location and data flows with your administrator before entering credentials.
You need access to the primary seller account to generate X-API-KEY. Keep passwords and keys out of ordinary support messages and screenshots.
Use the EasyEcom mapping guide to check which records and fields your workflow needs.
Steps to connect EasyEcom
Prepare credentials in EasyEcom
- Sign in to your EasyEcom primary seller account.
- Open Account Settings → Change credentials.
- Under X-API-KEY, select Generate X-API-KEY.
- Store the generated key securely.
- Open Location Master in the primary account.
- Identify the Location Key for your intended location.
- Prepare the registered EasyEcom email and password for the connection.
The API key and Location Key serve different purposes. EasyEcom requires the API key for authorization, while the Location Key identifies the location.
The official EasyEcom API documentation explains these credential sources and API limits. A new API key starts in the default tier. Ask Support to coordinate any production-access review with EasyEcom.
Select EasyEcom in Optiply
- Open Settings → Integrations.
- Wait for the source lists to load.
- Select Add a source.
- Search for EasyEcom in Select a source.
- Select EasyEcom under WMS & Fulfillment.
- Select Next.
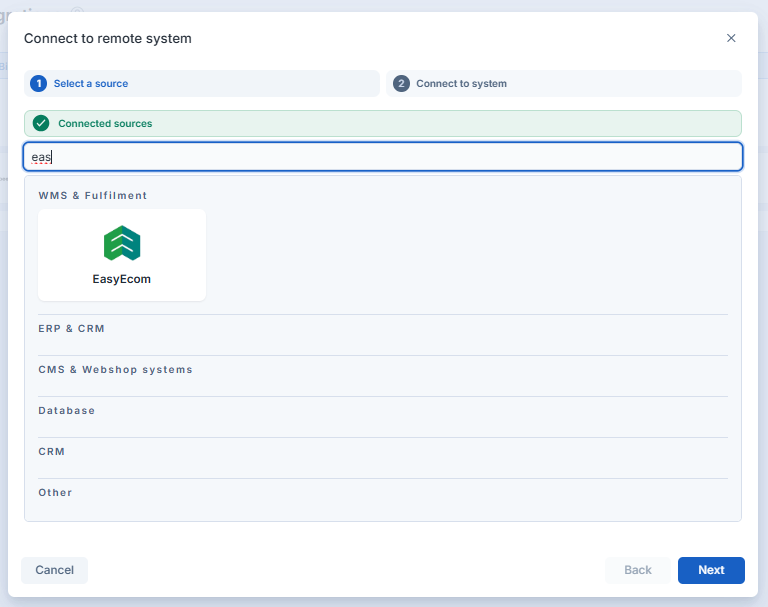
Complete the offered connection path
- Enter the four requested credentials in Connect to system.
- Choose Connect when the form allows it.
- Follow any further authorization instructions shown.
- Return to Settings → Integrations.
- Check the intended source for Connected.
- Compare an agreed product or order in both systems.
If Contact us appears instead of the credential form, request setup assistance through that control. This can also happen at the account's integration limit.
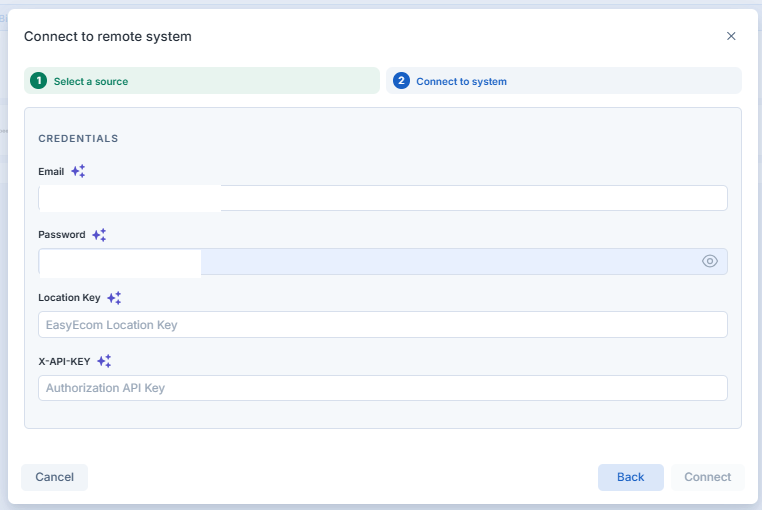
Do not copy the example or placeholder text from the screenshots.
Fields in the EasyEcom connection form
| Field or control | What you enter or check |
|---|---|
| Registered EasyEcom email for the connection | |
| Password | Matching EasyEcom password |
| Location Key | Key for the intended location, from Location Master |
| X-API-KEY | API key generated from the primary seller account |
| Connect | Submit the valid connection form |
| Contact us | Request assistance when offered |
| Connected | Linked source, not confirmation of record transfer |
What you see when EasyEcom setup worked
The intended source appears as Connected when linking succeeds. Connected is not proof that records transferred. Check the agreed records separately before using the data for planning.
Limits of EasyEcom setup
Account access, available connectors and authorization screens depend on your account. The screenshots show the form, not a successful connection.
API limits and enabled flows affect data arrival. Setup does not assign a fixed first-transfer time.
If EasyEcom setup did not work
- Missing source or different fields: contact Optiply Support with the connector name and screen description.
- Disabled Connect or failed authorization: verify Email, Password, Location Key and X-API-KEY for the intended account and location.
- Missing primary-account access: ask your EasyEcom administrator to prepare the key.
- API-limit error or absent data: ask Support to check API access and record transfer separately.
Tell Support the intended location, required flows, screen and error message without credentials. Ask for the secure setup route when credentials need review.